Save Your Own Cut Flower Seeds
“All the flowers of all the tomorrows exist in the seeds of today.”
— Robin Craig Clark, “The Miracle of Flowers”

Calendula.
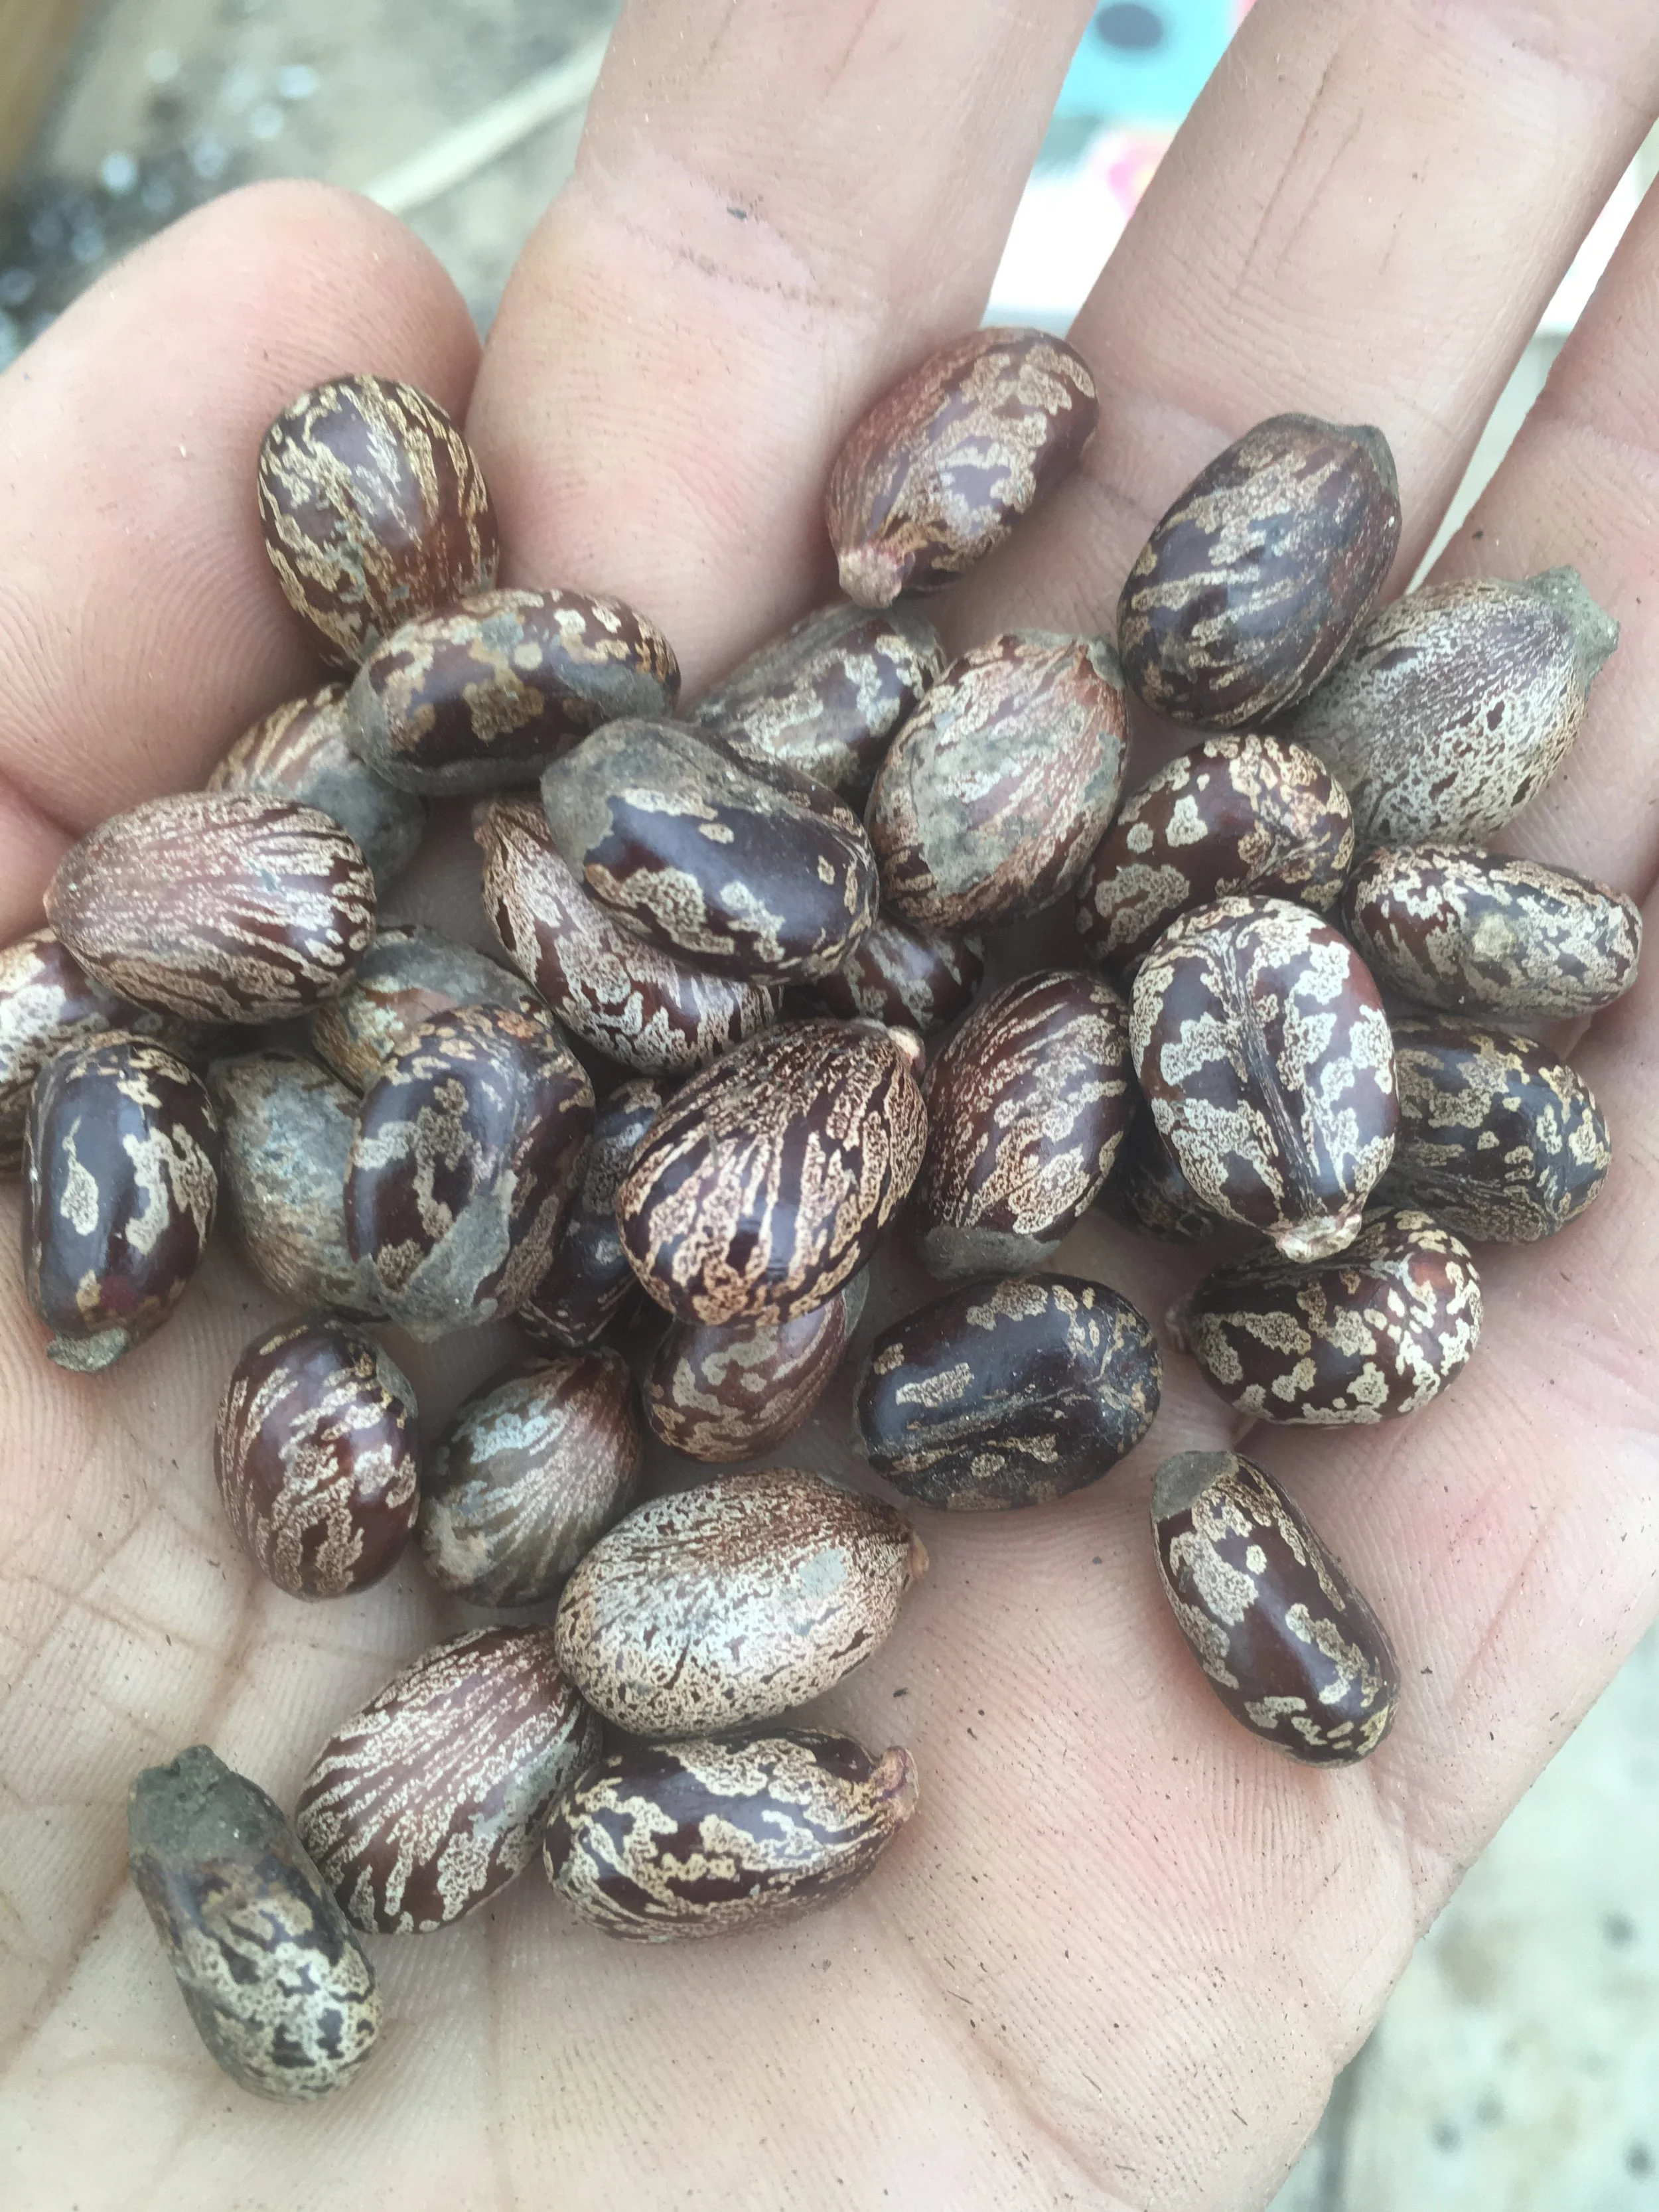
Castor bean.
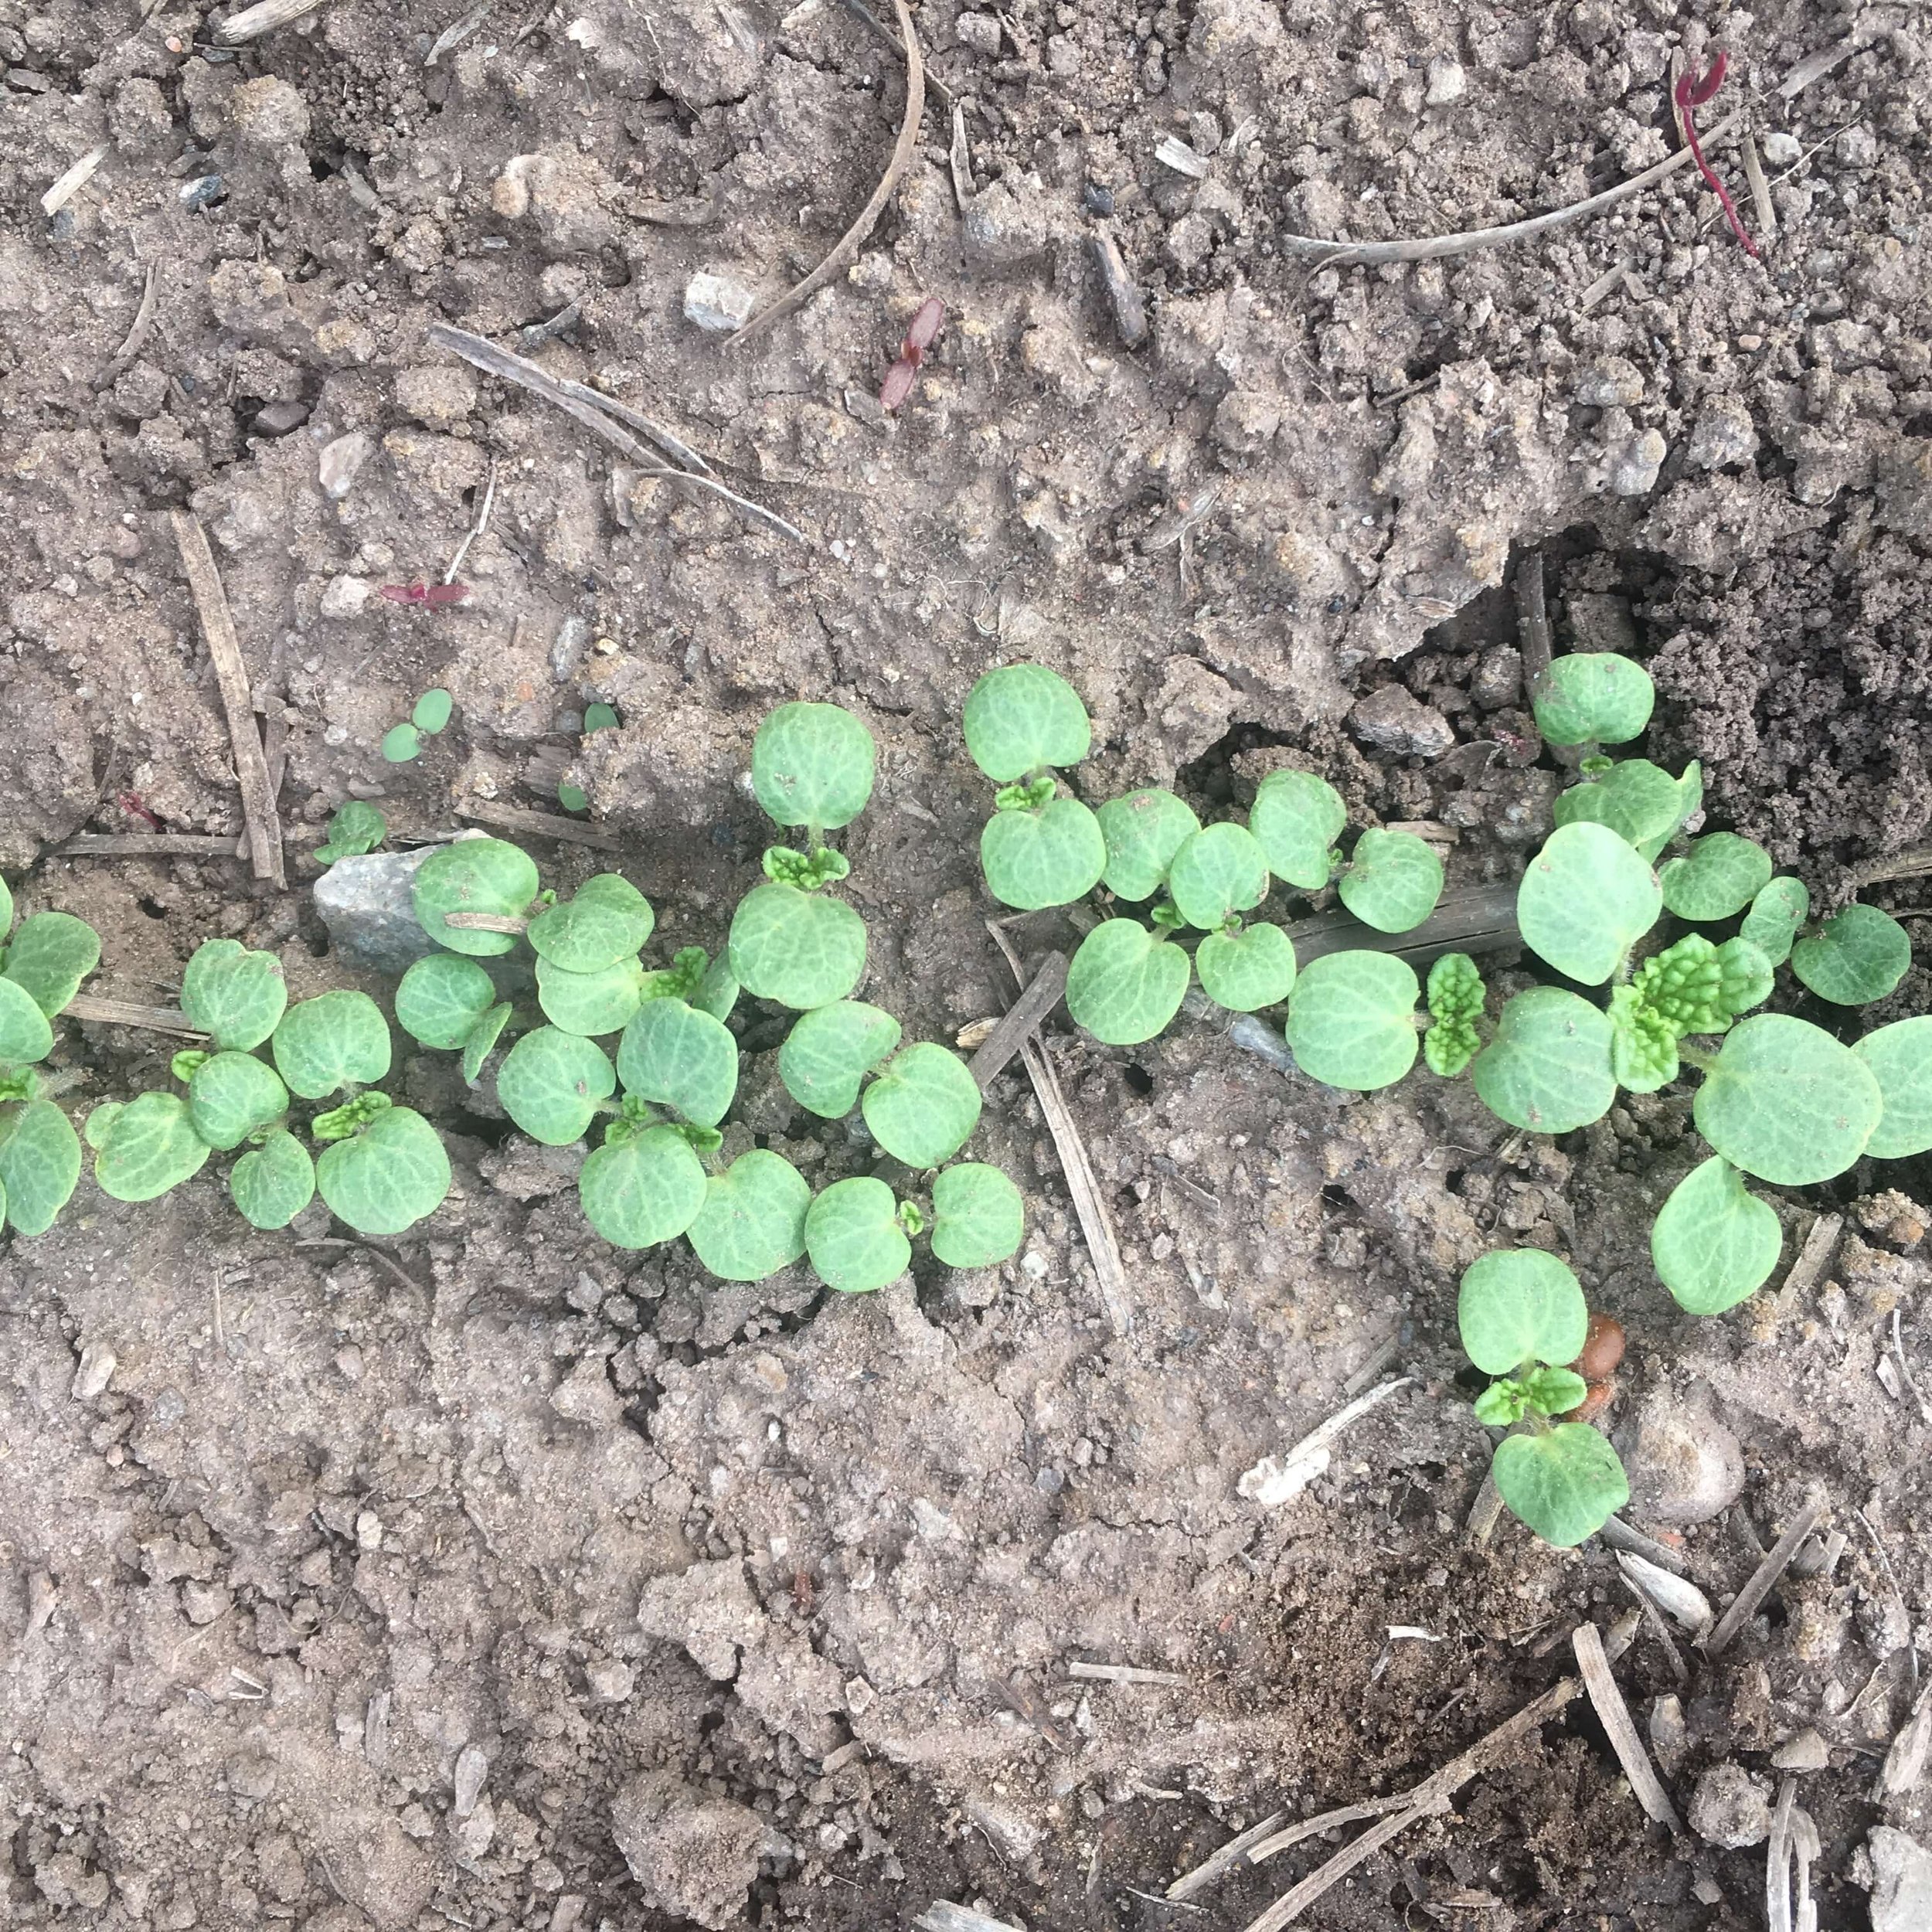
Saved Bells of Ireland.
As I began sowing seeds in the greenhouse this year, I found myself looking forward all the way to the fall, when I could begin to harvest seed from my flowers. I was thinking back to the past with gratitude for myself and all the generations before me who saved seeds, keeping them safe until they could be grown again. Saving your own seed helps you close the circle of your season, and allows your plants to realize their number one mission: reproduction.
I’m writing this post because, while there is a strong movement toward seed saving in vegetable growing circles, not much has been accessibly published on flower seeds, especially for small-scale production growers. It’s very difficult to find processing documentation, best practices, longevity data, or isolation requirements for flower seed production in almost any species. While this is something I’d love to work on, I’ve only got one life to live, and I chose to farm the flowers, not the seeds! However, there are lots of super helpful and important vegetable seed-saving resources out there that can help you understand the basics of seed saving, no matter the plant. See the list of resources at the end of this blog.
⚠️ Pro Tip! Learning the scientific family of the plants you grow—i.e., Asteraceae—can help you identify its seed-production traits, but book learnin’ only goes so far, as they say. Mainly what will help is lots of dedicated observation, practice, and time.

Why Save Seeds?
Besides the spiritual, historical, and esoteric dimensions of seed-saving, there are many practical reasons to save your own seed. Here are my top three:
Fresher seed means better germination. Often, seed we buy may have been stored for long periods, and there is no guarantee that it was stored in the right conditions to preserve its longevity. Major examples of this for me have been my staple greeneries, including bupleurum, Bells of Ireland (see the photo above of germinating saved Bells seed), and cress. Bupleurum and Bells are notoriously difficult to germinate, but not if you use your own seed. When I started growing bupleurum, I thought people who grew it successfully must be witches because I could not get it to germinate at a decent rate. Once I started saving my own seed, bupleurum was no longer a problem for me—in fact, I don’t even consider it difficult any more. Same with Bells—no freezing, soaking, or babying necessary: just plant the fresh seed you saved from last year and they’ll pop up in 10 days happy and ready to bloom.
Over even just a few seed generations, your plants and seeds become bioregionally adapted. You are collaborating with them to make them more successful in your area, whether it is hot dry desert like mine, or a cool maritime climate like the Pacific northwest. The plant is learning how to live where you live; learning how to become your family.
You can select for the traits you value. Do you want that calendula to be taller? Me too! By selecting plants that express those desirable traits, whether that’s height, color, long-lasting blooms, or some other factor, you’ll move your seed stock closer to your ideal. Of course, plant breeding is complex, and many people make a career and Ph.D. of it, but it’s also as simple as doing what human begins have done for millennia: take what you like and keep planting it.
What To Save? What Not To Save?
You may find yourself wanting to save everything, especially the prettiest ones, but before you go to all the trouble only to be disappointed by what appears next year, take note of these two guidelines:
Unless you can easily isolate varieties, or unless you know for sure that the plant you want to save seed from has self-fertile flowers (see the seed books for more on that), you’ll have the greatest success with plants of which you only grow one variety per species.
⚠️ Pro Tip!This means learning those Latin names! Of course, if it doesn’t concern you that your saved seed be “true to type” —i.e., if you don’t care that you may not get the same color/form/habit as last year —you can save whatever you darn well please. Humph!
For example, I’d love to save seed from the organic ‘Merlot Red’ scabiosa that Johnny’s breeds. However, I also grow literally every other color of scabiosa out there, so I know that the ‘Merlot’ will not come true next year. I also have no idea how far away I’d have to put a dedicated seed patch of scabiosa to ensure that it doesn’t cross-pollinate with other varieties, because ain’t no data on that.
However, I do save seed from both my Ammi varieties: Ammi visnaga ‘Green Mist’ and Ammi majus ‘White Dill.’ They always come true, because as distinct species, they cannot cross with one another. I also save seed from purple laceflower, Daucus carota ‘Dara’, again because it’s a different species. But Daucus carota is the same as the carrot we eat for food, so if you’re growing carrots out for seed, don’t let ‘Dara’ flower at the same time!
The plants you want to save seed from must be open-pollinated. That means they are not hybrids or F-1, two designations you may see on seed labels and in catalogs. Hybrids are amazing plants created by crossing two varieties to achieve a unique result. However, the seed a hybrid plant produces will not come true next year—you’ll get a broad rainbow of traits that reflect the hybrid’s parentage. While it is really fun to see what happens with a hybrid’s seed, it is not predictable and not recommended for production farmers. ⚠️ A note on terminology:
Common name: the name you and everyone in your region uses to refer to a given plant. There can be many common names for a single species, or a common name may refer to several different species. They are imprecise names.
Scientific name: The italicized Latin name used by scientists to clearly identify a plant. One species cannot breed and produce viable offspring with another species. The scientific name is made up of two parts: The first word, which is the genus, and the second word, which is the species. Therefore, Ammi visnaga and Ammi majus are in the same genus, but are not the same species. They cannot cross with one another and produce viable offspring.
Variety: A certain kind of plant within a species. Both the varieties ‘Frank Holmes’ and ‘Café au Lait’ are in the species Dahlia pinnata, though their flowers are very different in appearance. In general, unless they are physically or temporally separated, varieties can cross-pollinate one another and will produce viable offspring. Those crossed offspring will express traits of both parents. If you are trying to keep a variety’s traits “true”, do not allow two plants in the same species to cross with each other. Results will not be predictable.
Easy Plants to Start With
When I say “easy”, I mean a couple of things (generally, if a plant I grow has one of these traits, I’ll give it a go):
Plants that don’t require you to keep them in the ground much longer to produce seed than you would otherwise—these are just convenient.
Plants whose ornamental part is already the seed—these are plain easy.
Plants whose seeds are easy to harvest because of how they’re held on the plant (think beans).
Plants whose seeds don’t require much processing.
Plants that you simply don’t grow more than one variety of within the species; e.g. Bells of Ireland, Moluccella laevis, are the only plant in the genus Moluccella that I grow, so I know my seeds will come true. Unfortunately, Bells do not have any of the other traits on this list—but because their germination is so much better from saved seed, I don’t mind the work.
See my other blog posts for species I’ve saved before and what I thought of the process for each.
Harvesting
Selection & Tagging
Before you harvest, choose which plants you will harvest seed from. Pick the most absolutely beautiful ones, the tallest ones, or the ones with a color variation you like. Don’t expect all these traits to appear next year, but by doing this you’re increasing the likelihood that they will. This means that you need to be thinking about seed saving while your plants are in full flower. Was there one that matured early? Tag it for seed. Were there some that were super tall? Tag it for seed. Was there a crazy beautiful color? Tag it. If you have a generally healthy bed of plants, you can also tag the plants that you don’t want to harvest for seed, and avoid contaminating your good stock with bad genes. Keep flagging tape on hand in your fields, and establish a color code (maybe neon green for YES and hot orange for NO? There are lots of wonderful flagging tape colors hahah).
Allow Full Maturity
Try to remember what the seeds you bought looked like. Are the seeds on your plants looking like that? Or are they smaller, or greener? Have patience and let your plants produce hard, dry, tough seeds before you harvest. Make sure they look like the seeds you’ve bought and had success with before. For the most part, this means allowing the plant to completely dry out, having put all its life-force into the next generation in its seeds.
There is a balancing act between allowing full maturity and missing the window for harvest – on carrot family plants in particular (Ammi & Daucus spp.), you’ll notice that when left too long, all the good seed drops onto the ground and just creates weedy beds L. Observe the plants you’re saving for seed frequently. Visit them like you visit your seedlings in the greenhouse—because that’s what they’ll become. Monitor your patches for signs of maturity, like browning, drying, and shattering. Rich Pecoraro, of MASA Seed Foundation, says to let the first 20% of your seed to mature go (don’t try to save it). Keep the middle 60%, and leave the last 20% to the earth as well. You want that rich, consistent middle.
Cutting for Ease of Processing
To make your life easier, try to keep all parts of the plant that are not connected to the seed out of your harvest bucket. You’ll have much less material to move around, much less to get in the way of your sifting, and you’ll generally be happier and more likely to continue seed saving. So if you can strip just the seeds into a bucket out in the field, do that. If you can cut just the seed head off without the stem, do that. There are some exceptions to this—sometimes you want to get a seed crop out of the field but it’s not quiiiiiite mature yet.
⚠️ Pro Tip! What to do if you have to flip your bed but the seed isn’t mature:
You can cut whole plants and lay them out on a tarp to dry. Once the plant is cut, it knows that its last chance for survival is to put all its energy into its seeds—so that’s what it will do as it dries down. Plants are freakin amazing. Once they’re dried down, make sure the seed looks mature, and then process as usual, watching out for the occasional immature seed.
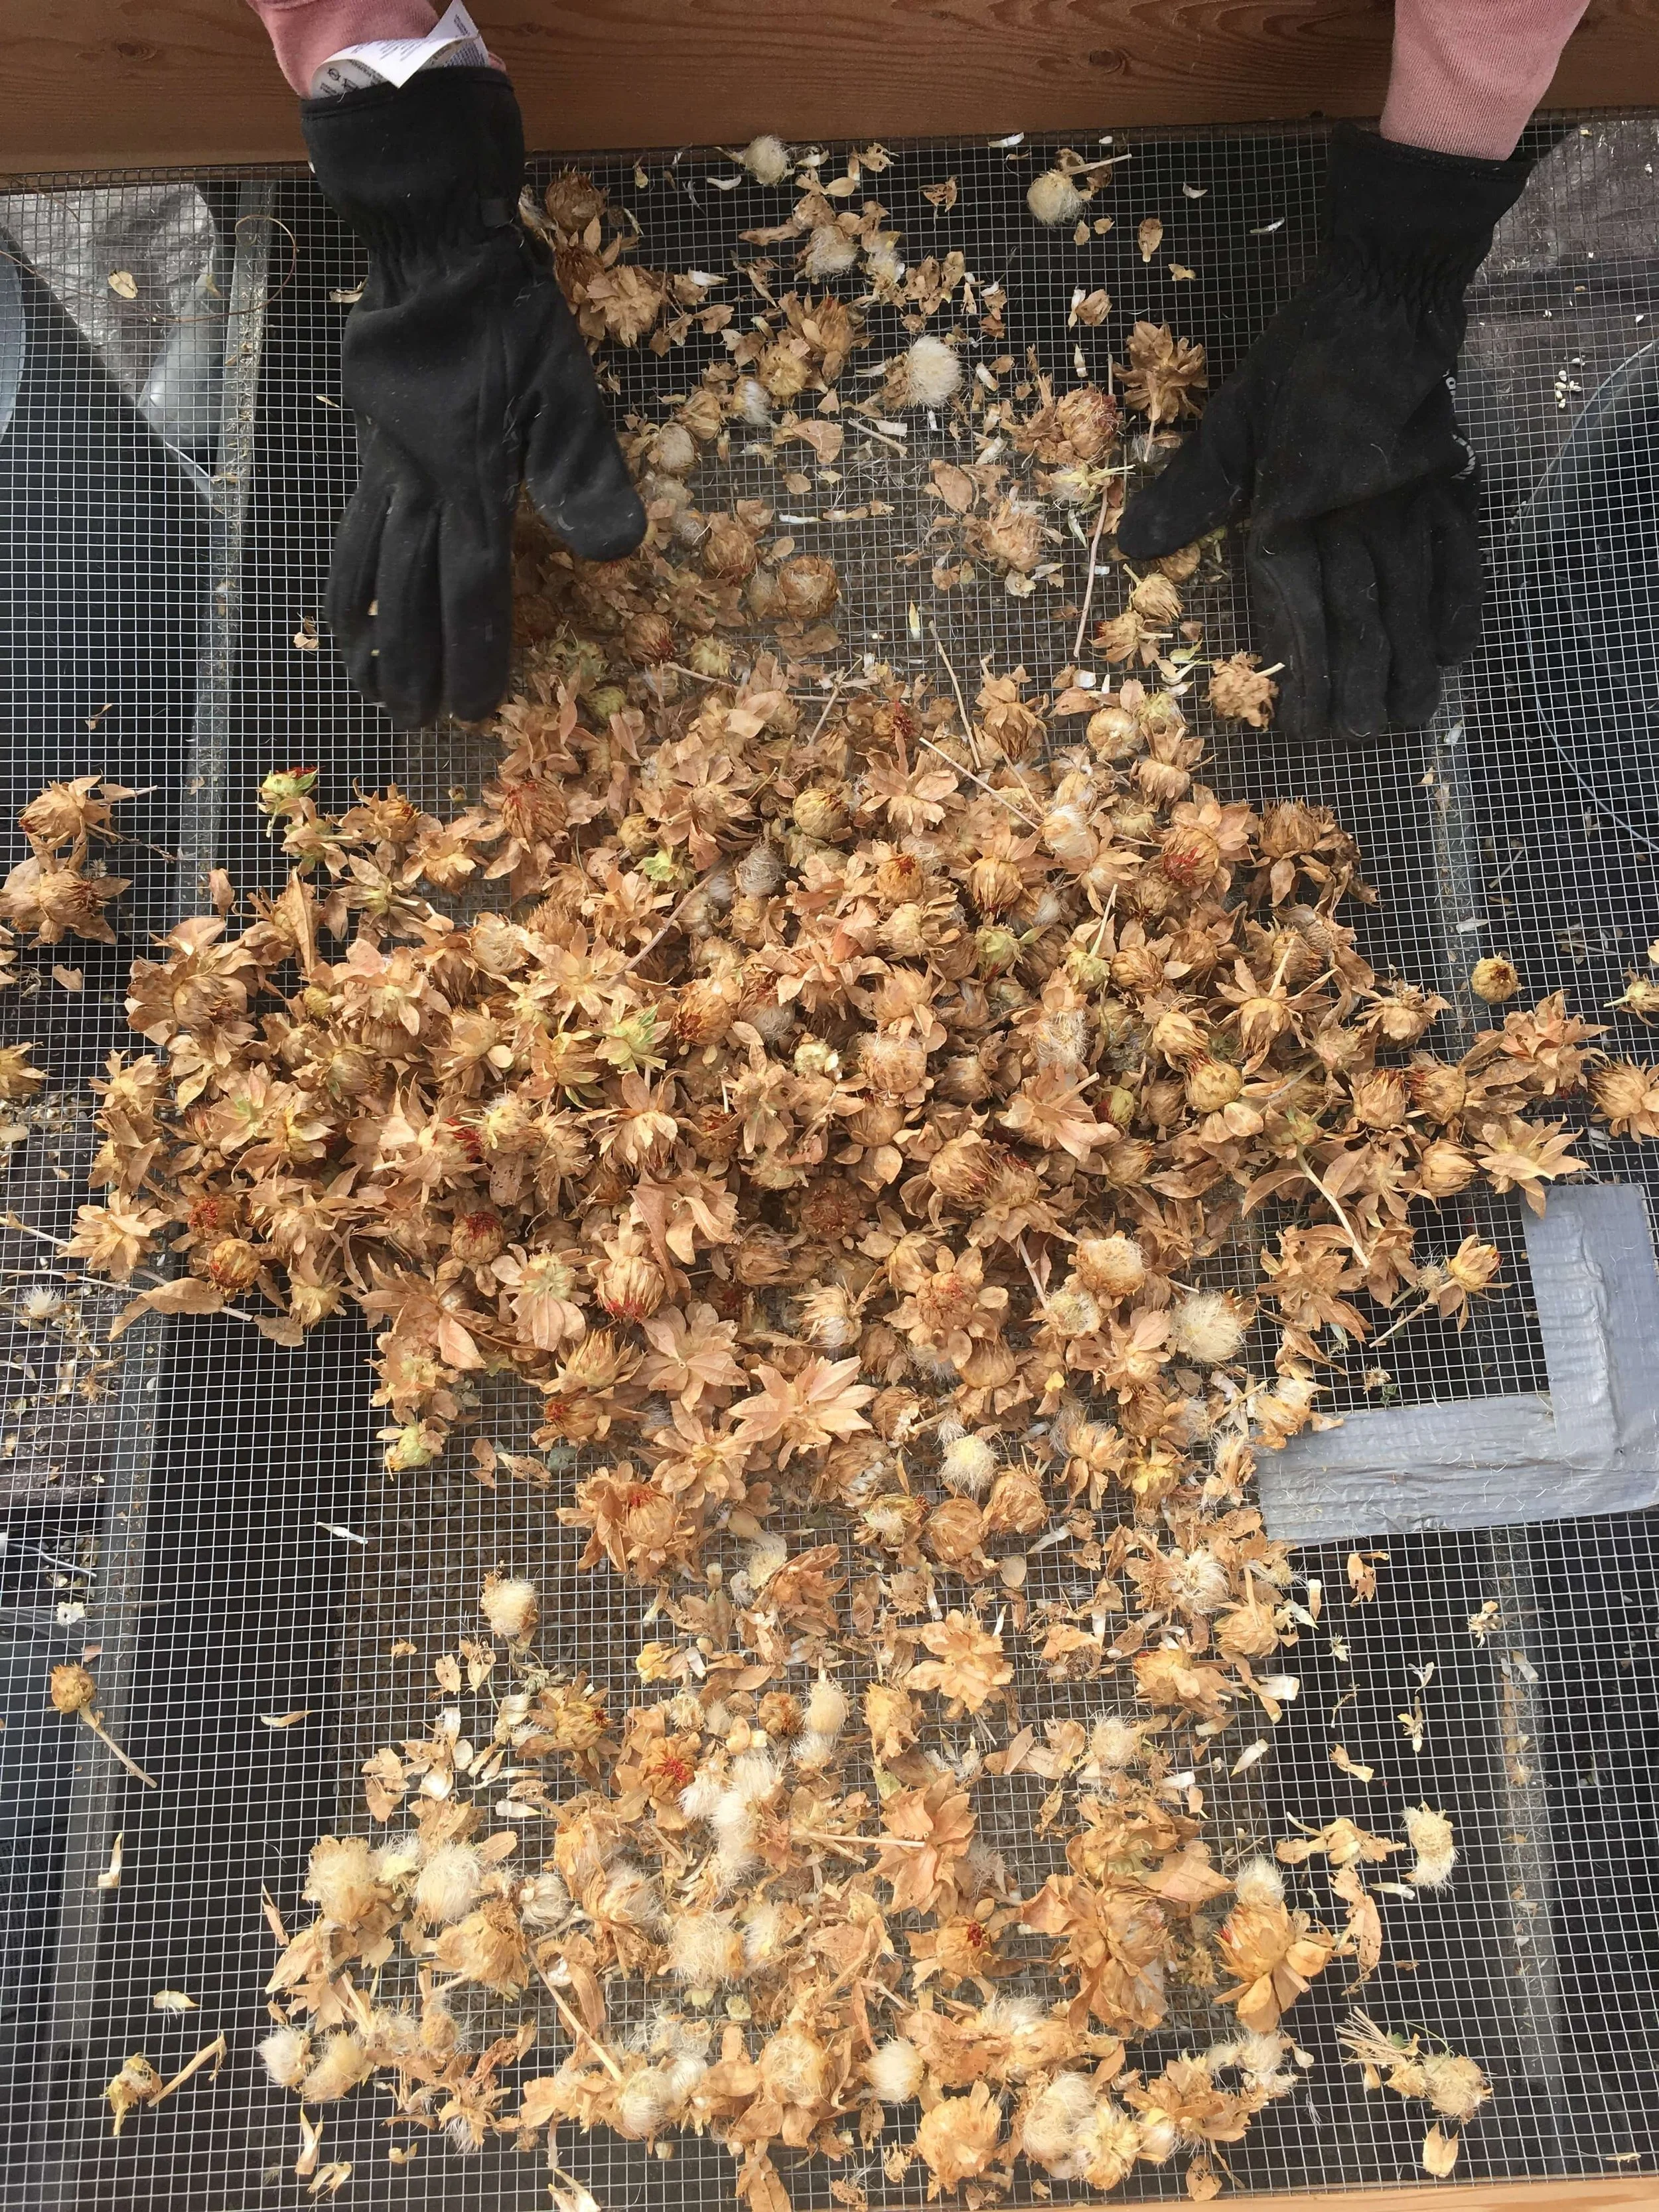
A large screen on a box-like frame, being used to separate safflower seed from seed heads. Could also be used for drying.
Processing
Further Drying
Sometimes, seed might be mature, but still kinda wet, maybe from humidity or a recent rainstorm or just cooler fall weather. To get the plant ready for processing, it may be necessary to dry it out some more. Find a protected place out of wind and weather for your seed heads to dry. You can spread the heads out on a large screen or newspaper—something that will wick any moisture the seeds might exude. Screens are best, especially off the ground. Many seed savers build screen boxes for this purpose and for rubbing of seed. The screen is attached to a box, and then sandwiched between another thin strip of wood (lath). This is very useful for drying and processing.
Another method for drying, and for allowing more maturity, is to hang your seed plants upside down in a barn or other dark, warm area, and wrap the seed heads in a paper bag. This will help the plants dry out and the bag will catch any seeds that drop out or try to escape. Saves space, too!
Separating Seed from Plant
Some seeds will require further processing to separate them from the plant material. You may need to rub them on a screen, rub them between your hands, beat them with a stick, or run over them with a car. Try it all!
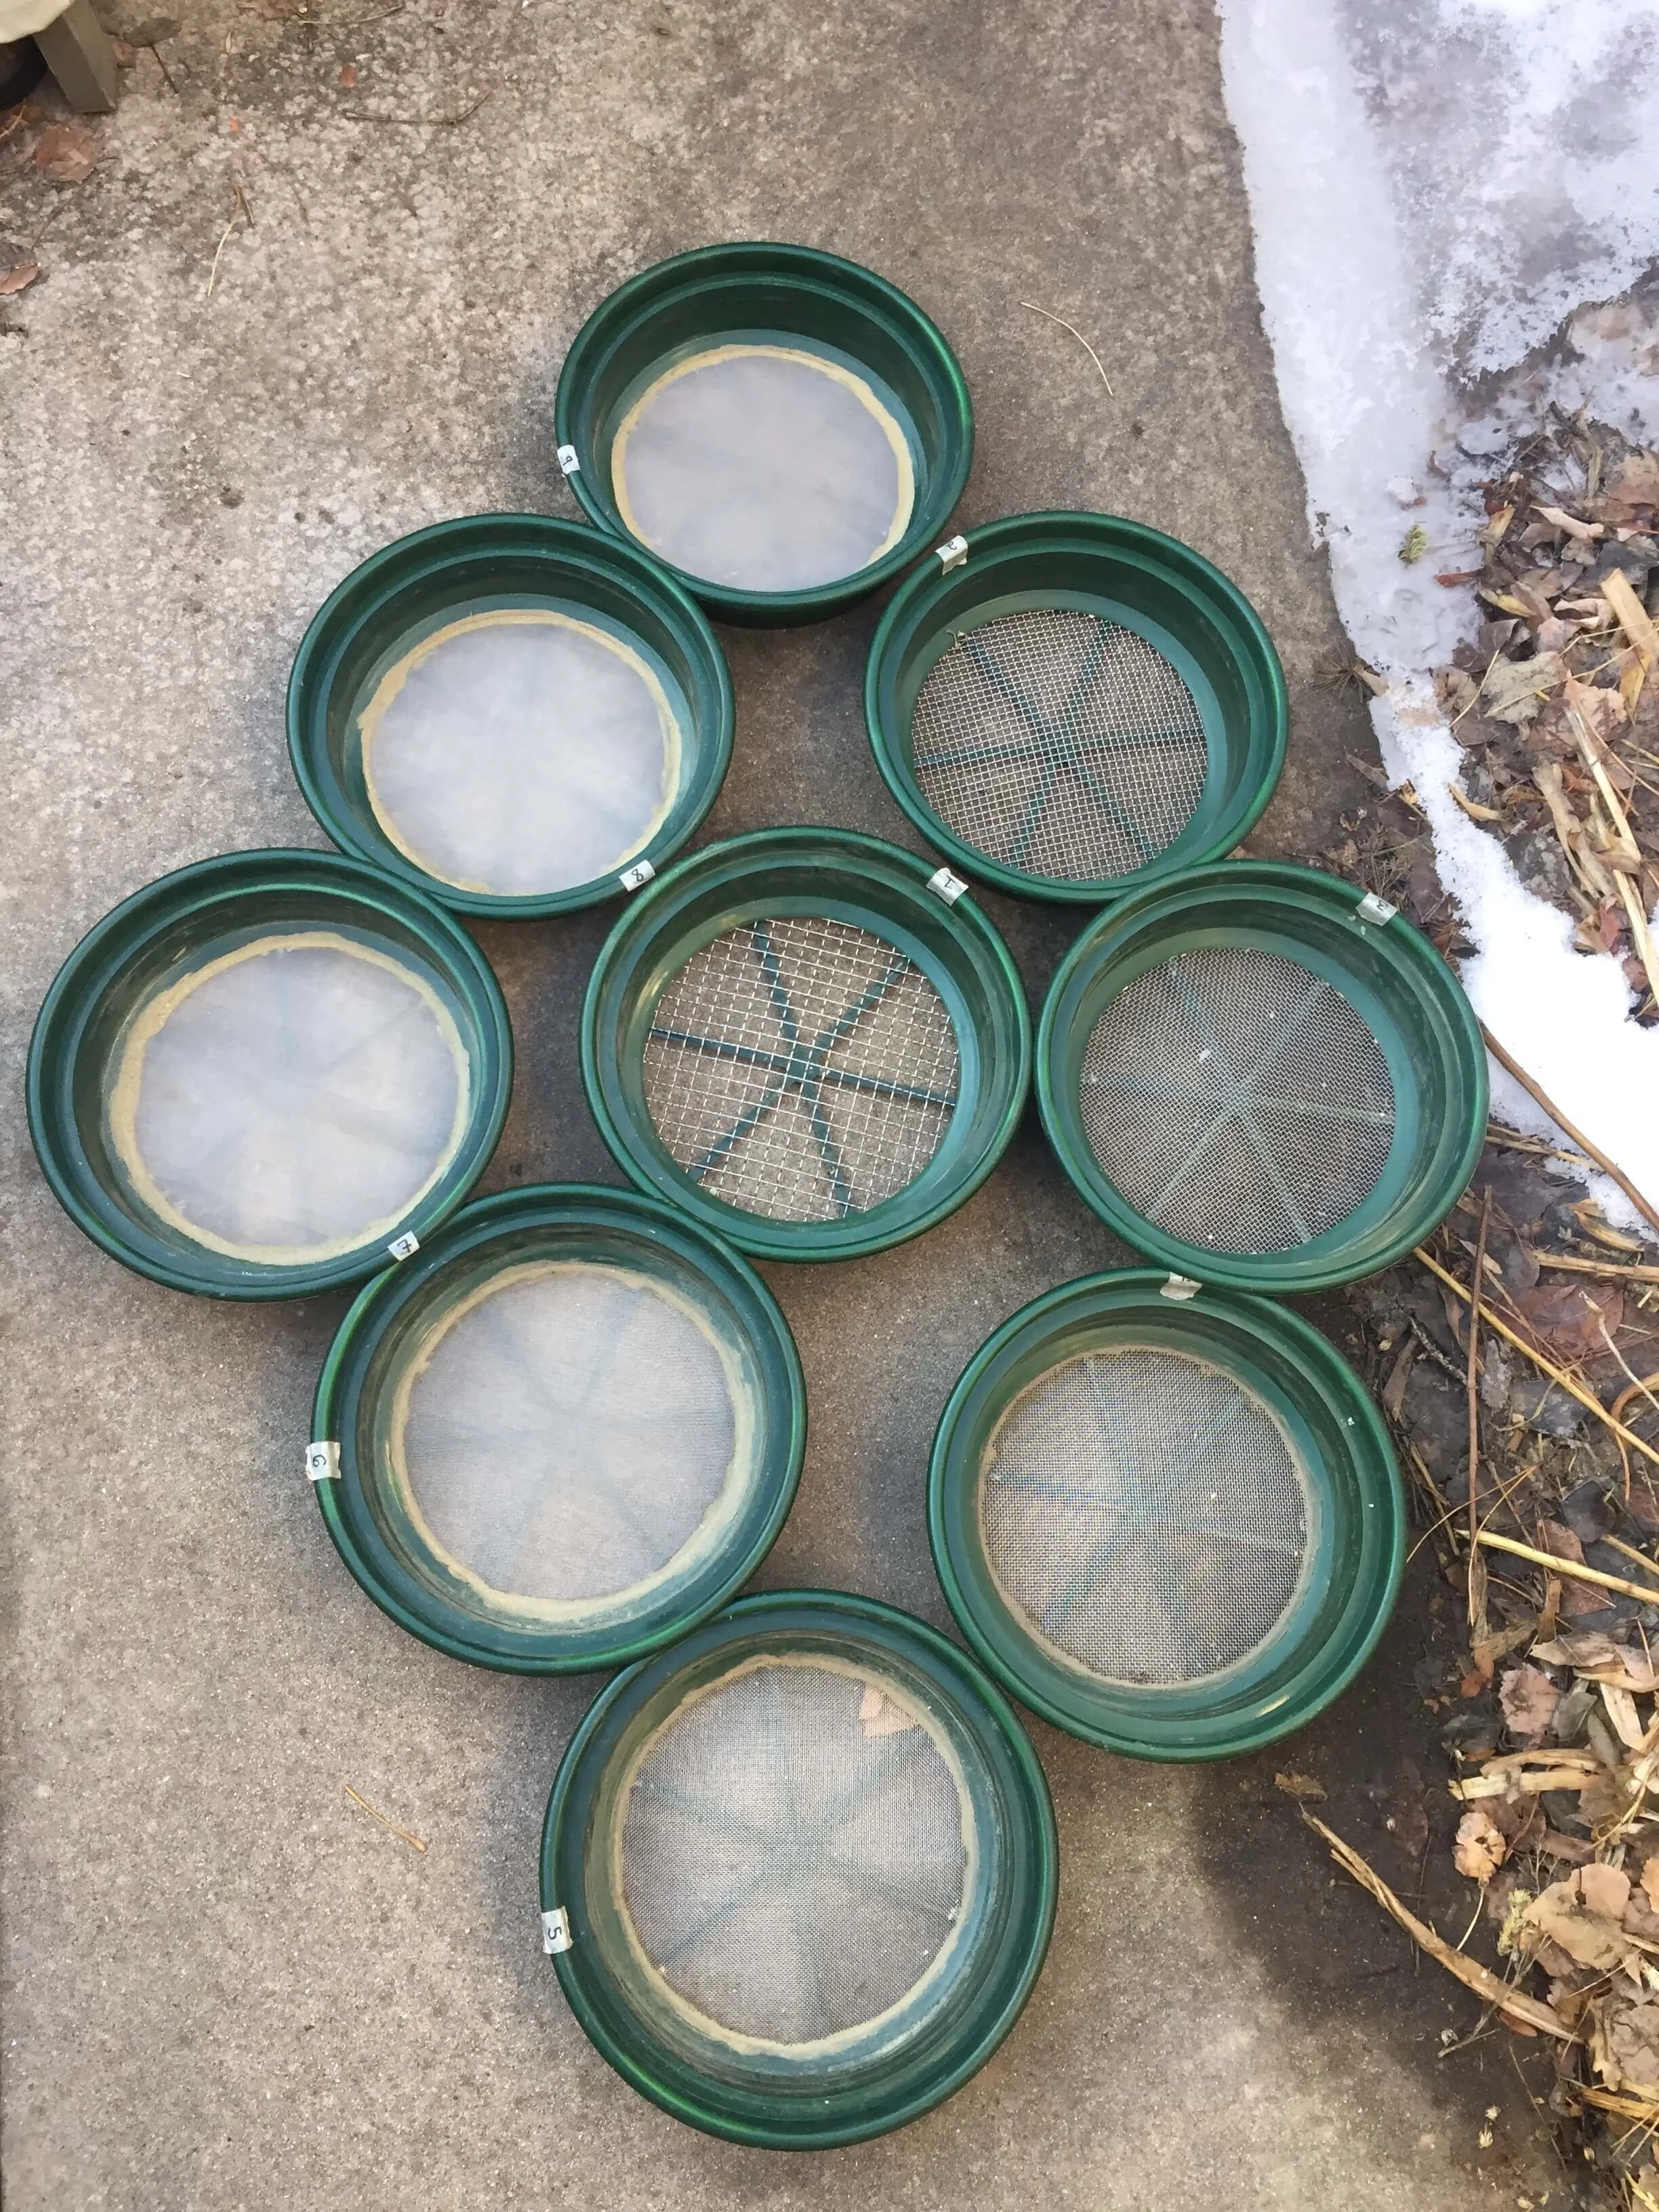
9-pan plastic screen set used for gold panning.
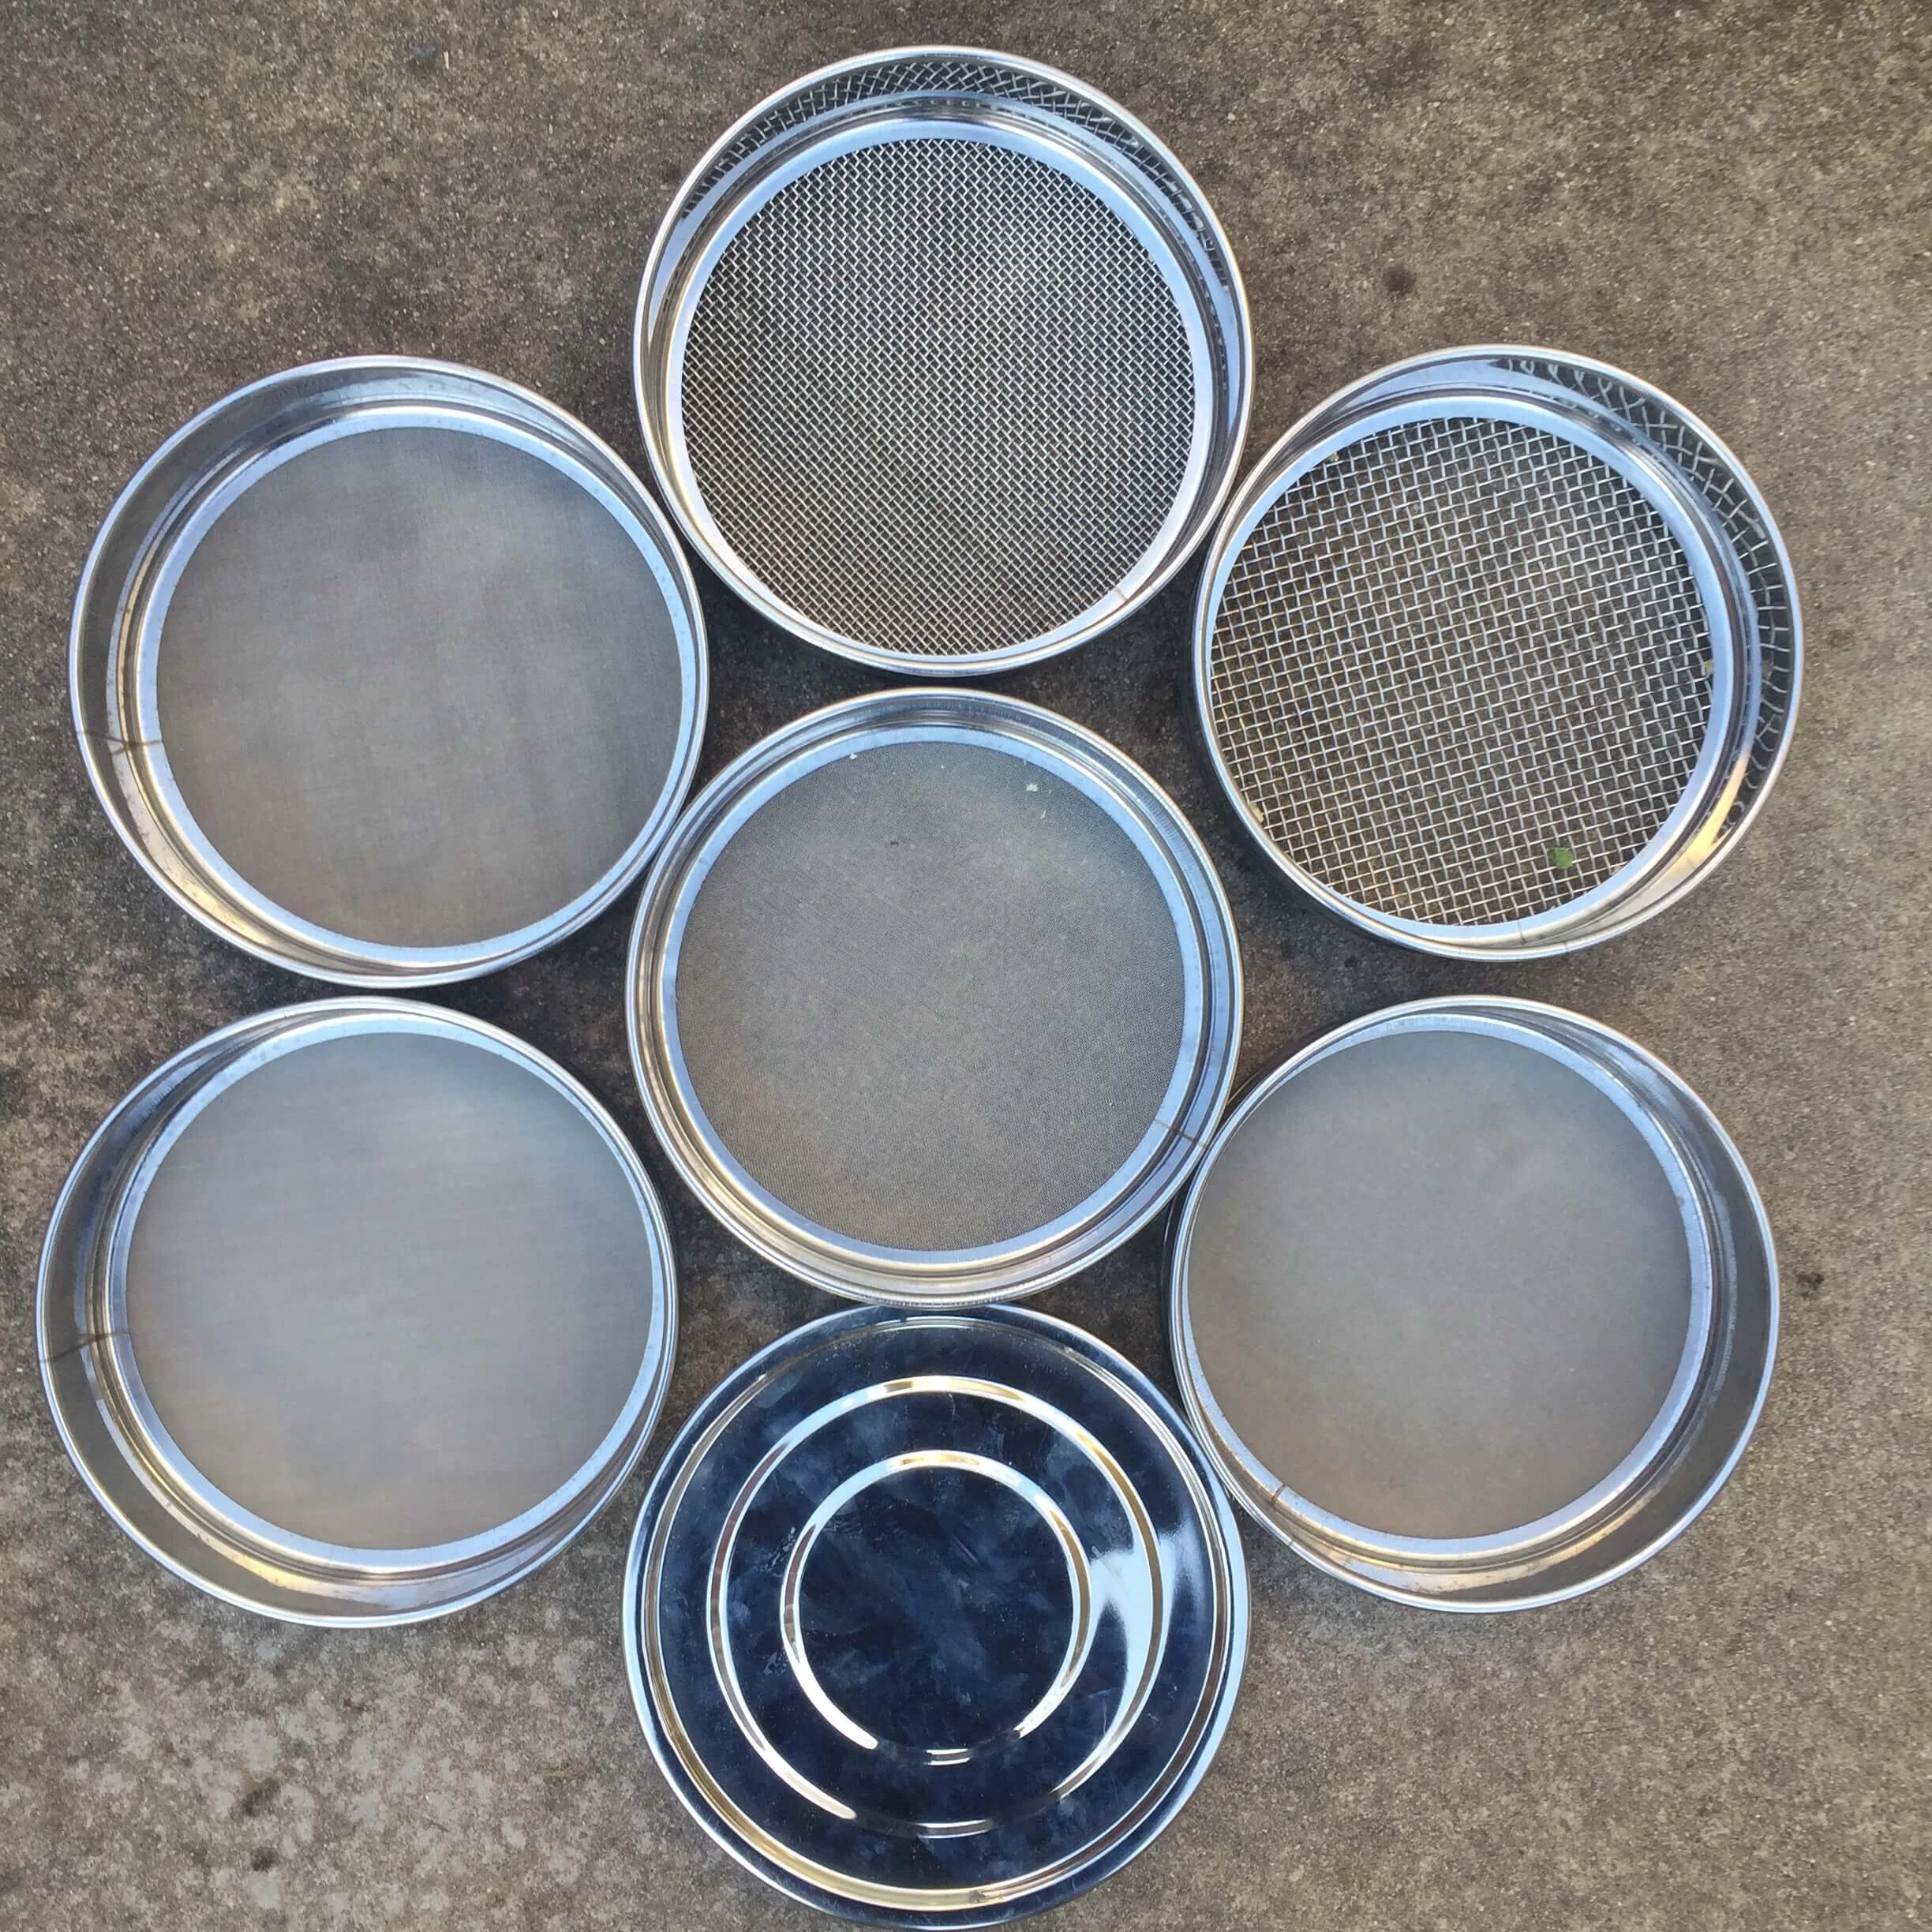
6-pan metal screen set by Fieldmaster.
Sort by Size with Sieves or Screens
The next step is to sort seeds by size. Screens are the best way to do this at home. This will also help you see the differences in seed quality, and help remove most of the plant material from the seed batch. You can use anything as a screen (colanders, kitchen strainers, etc) but if you intend to do a lot of seed saving, or you find yourself fascinated by the process, consider getting a dedicated set of screens, or building your own.
⚠️ Pro Tip! Screen/Sieve Recommendations
I use two different sets of screens for seed processing. The first is a set of 9 screens with plastic sides and a good range of sizes. I had to put caulk along the edge of these though because my seeds kept getting caught under the edge. These are nice because they’re pretty large so you can do a lot of seed at once. I don’t like that they are plastic, because it means that they often get static cling, which is no fun for seeds. Keep a dryer sheet on hand to remove static electricity. You can find these screens here —yep, they’re marketed for gold panning.
My favorite screens are this set of all-metals ones that are made for scientific soil sampling in classrooms. They are small in diameter so you can’t do much seed at once, but they also have the tiniest openings so they’re great for those infinitesimally small flower seeds (I’m looking at you, Artemisia). They also have a lid and a solid bottom tray, so you won’t lose any material even if you shake the whole stack like a crazy person. They are expensive but worth it. Find them here.
The great thing about both sets is that thy stack together, so you don’t have to spend time pouring seed from one screen into another, and most of your seed will get sorted out on the first pass.
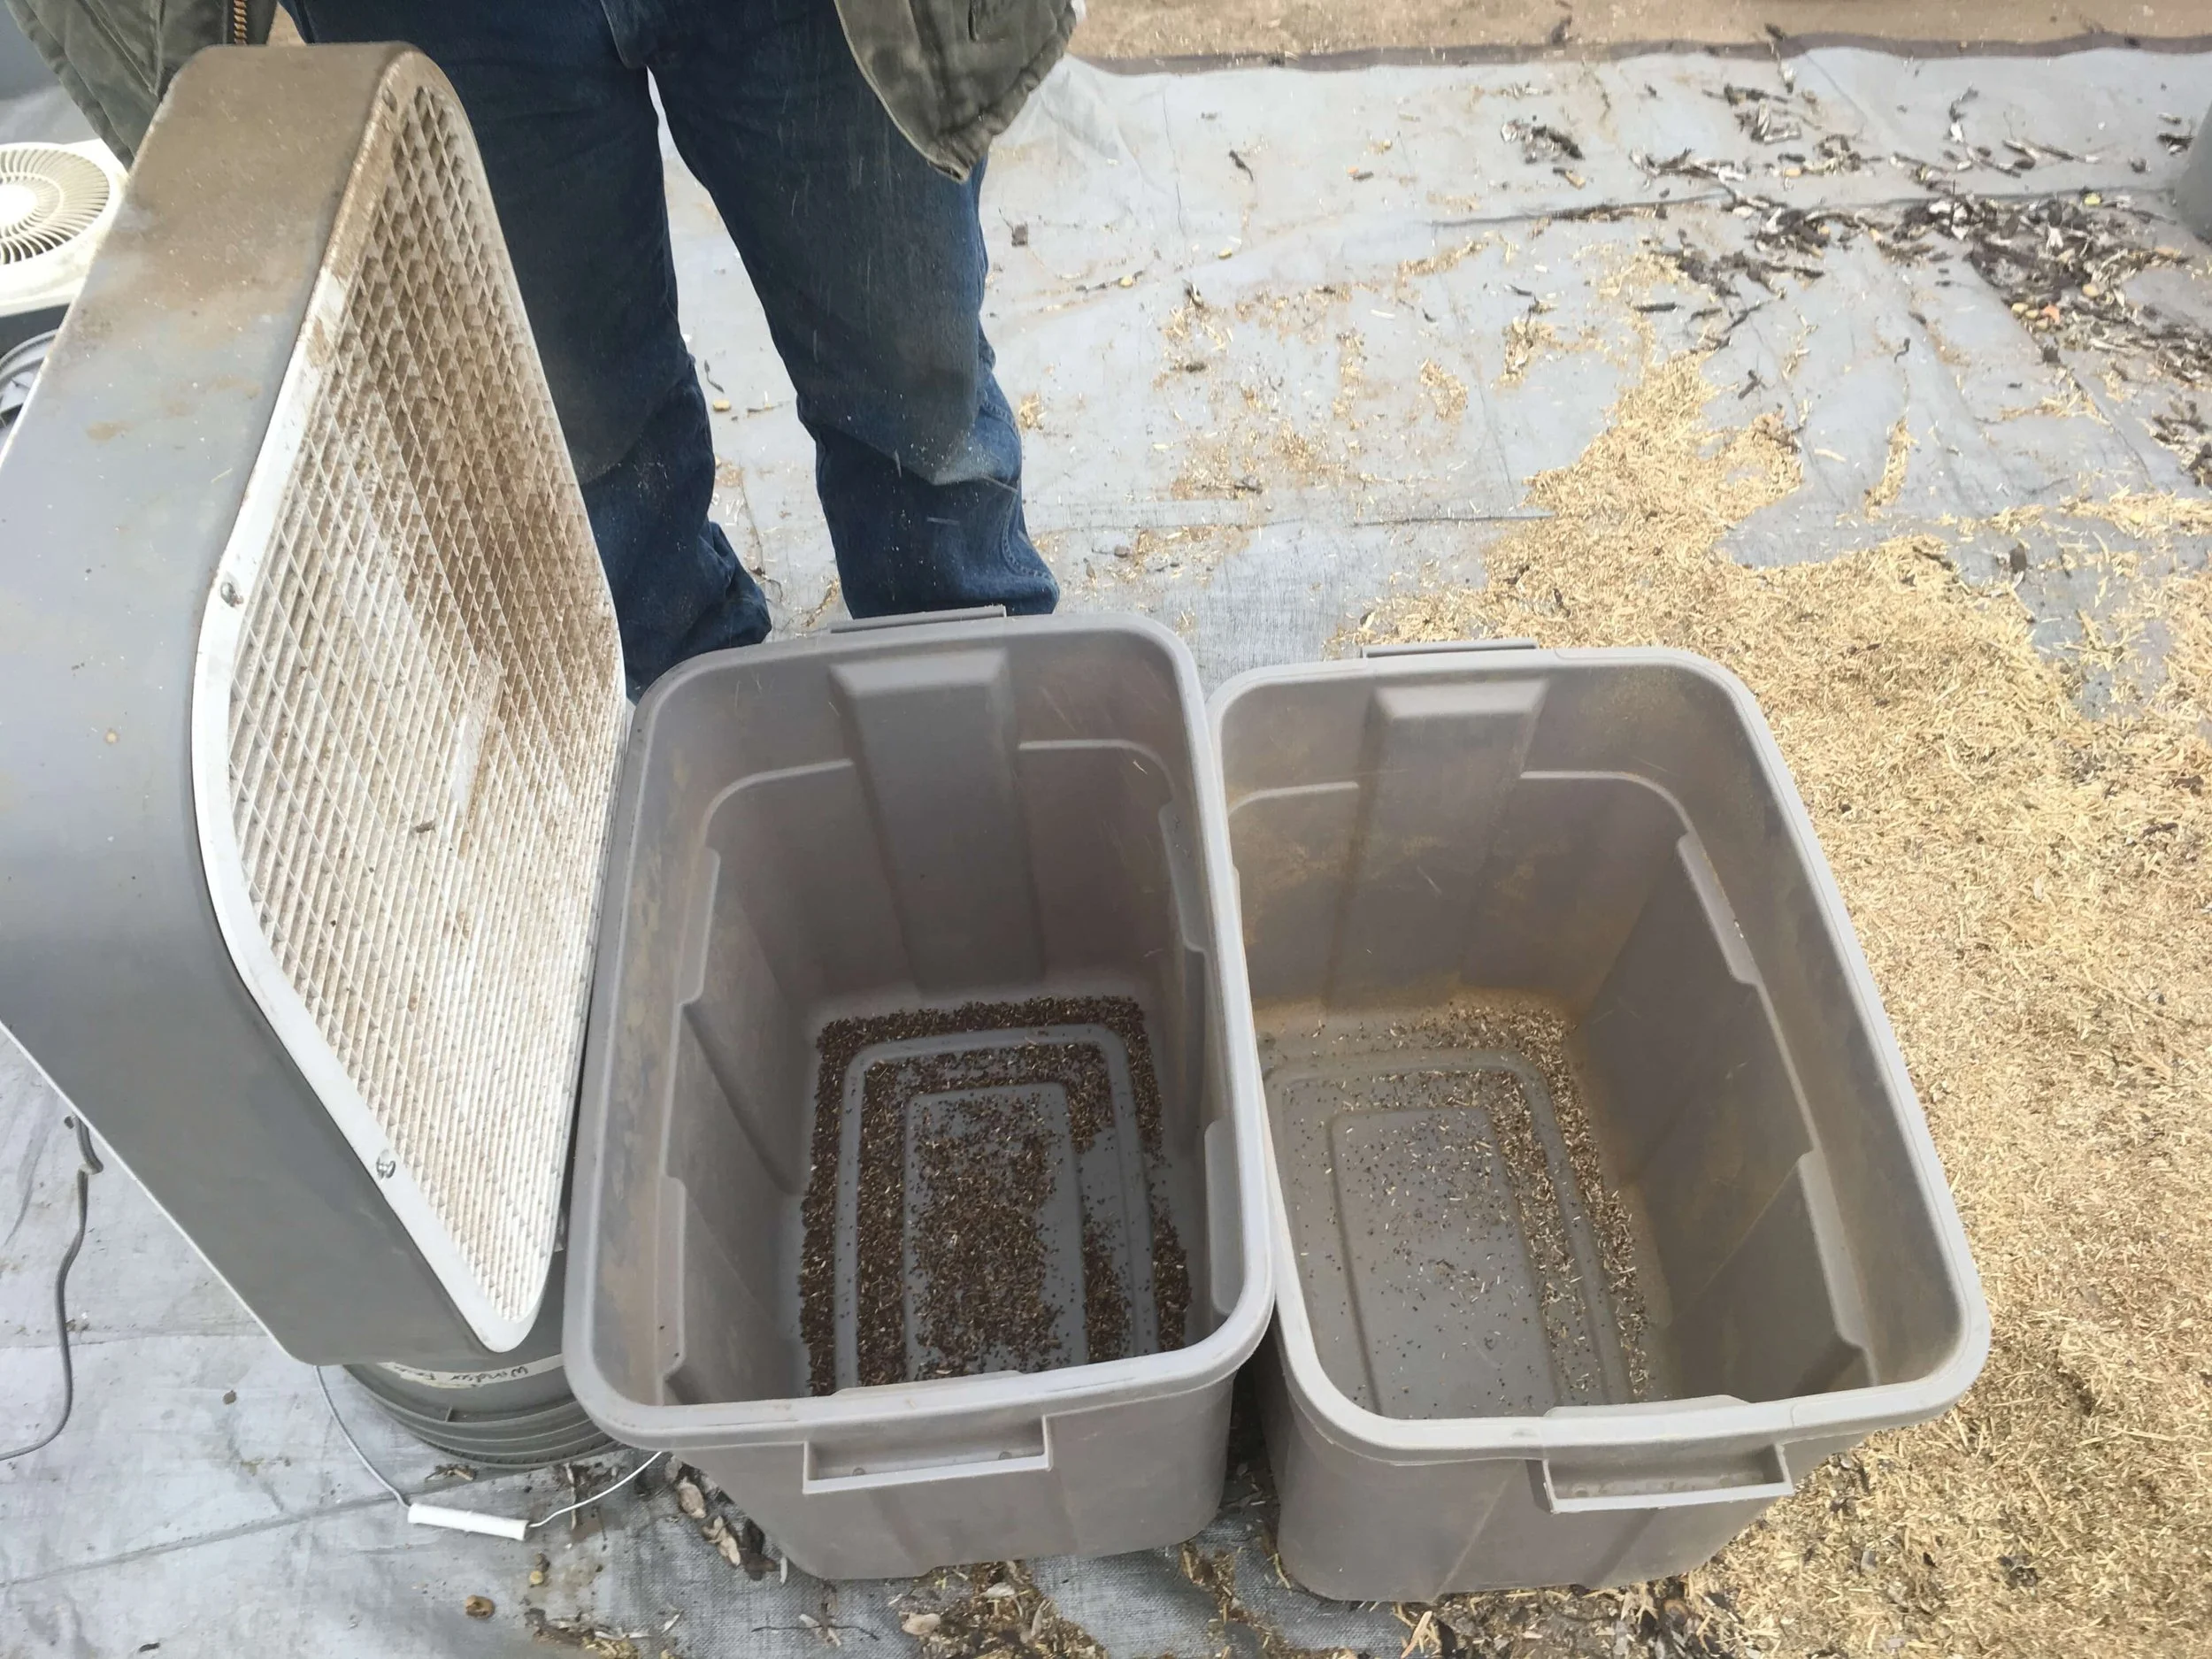
Super simple winnowing setup with two Rubbermaids and a box fan.
Sort by Weight by Winnowing
Winnowing is the process of getting lighter material out of your seed stock. In the olden tymes, folks winnowed with the wind, pouring their wheat or barley out of one container into another and allowing the wind or their own breath to carry the lighter material away. Nowadays it’s done with electric fans or fancy seed cleaner machines. Below, see a video of my winnowing some saponaria seed. Basically, I set up a fan off the ground, and put a big Rubbermaid/Tupperware container right next to it. I set the fan at a low speed to start.
I pour my sifted seed in front of the fan, being careful at first and observing how far the fan sends the stream of seed. Once I’ve calibrated, I can increase the fan speed and move my seed bucket closer to the front edge of the catching container, allowing chaff to be blown out of the stream while the heavier seed falls into the catching container. Pour the seed back into your seed container and repeat until the seed is as clean as you want (or as clean as it’s going to get – you decide). Winnowing is wonderful, one of my most favorite parts of seed saving!
Pitfalls to Avoid
When saving seed, remember that you are the steward of the genetics, and you’re deciding who gets to stay on your farm next season. So be aware of what you’re selecting for. Don’t save only from the first plants to go to seed, because then you’re selecting for a short flowering window. You could save from the last plants to go to seed, but you may then be selecting for late flowering. Go for that middle 60%.
⚠️ Pro Tip! Save seed from the plants you love!
If a certain plant is producing particularly beautiful flowers, or it’s quite tall, or it just has good juju, tag it and save some of those flowers so you can get that good good nice nice next year. Don’t sell every single stem – save some for the future! Complementarily, don’t save seed from plants you hate – you know, the ones you didn’t cut all season because they were a little deformed or short or eaten by bugs or whatever – the seed you save may not be great, and the genetics certainly aren’t! Save for what you love, for the most beautiful future you can imagine.
Storage and Longevity
⚠️ Pro Tip! Freeze your seed. Yes, all of them.
All seeds store best at low temperatures and low humidity. The top-tier seed banks in the world store their seeds at the coldest feasible temperatures (below freezing!) to keep the seeds viable long into the future. The Svalbard Global Seed Trust is super cool, figuratively and literally: it holds seeds at -18°C (about 0°F). That’s right, all seeds, even hot germinators like corn and eggplant. So if you have space, you can store all your seeds in the freezer, not just your cold or stratification-germinators (think Bells of Ireland, bupleurum, and larkspur). They will last a lot longer that way. Seeds are amazing, like moss piglets (aka water bears aka tardigrades). They can survive a lot, and they go into a sort of hibernation when stored at cold temps, reserving energy to grow for when conditions are right.
For storage containers, paper is supposedly better than plastic because it allow the seed to exude moisture without trapping it and making the seed mold. In my dry climate I rarely have an issue storing in plastic, but paper is probably better for the world, in any case. Use paper with really tight seals for those tiny seeds.
There’s not a ton of information on the longevity of flower seeds, but if you google around you can find a few charts. While some species remain viable for up to 6 years, I really try to order new seed or save my seed every year to give myself the best chance of success.
I hope this blog has been helpful! I will add more pictures to it as the season goes along and I learn more. For now, I’ll be releasing the following plant-specific seed-saving blogs over the summer, about weekly. Check ‘em out!
Bells of Ireland (Moluccella laevis)
Bupleurum (Bupleurum griffithii, B. rotundifolium)
Cape Daisy (Venidium fastuosum, syn. Arctotis fastuosa)
False Queen Anne’s Lace (Ammi spp.)
Hyacinth Bean (Dolichos lablab)
Jewels of Opar (Talinum paniculatum)
Mignonette (Reseda alba, R. odorata)
Nigella (Nigella damascena, N. orientalis)
Pod Scabiosa (Scabiosa stellata)
Safflower (Carthamus tinctorius)
Saponaria (Saponaria vaccaria)
Resources
Books
The Organic Seed Grower by John Navazio
Seed to Seed by Suzanne Ashworth
The Seed Garden by Lee Buttala
Breed Your Own Vegetable Varieties by Carol Deppe
All of the above are available through Chelsea Green Publishing, or your local bookstore.
The Complete Guide to Saving Seeds by Robert E Gough, available here.
Websites & More
The Seed Growers Podcast with Dan Brisebois. Fantastic podcast interviewing growers of seed from around the US and Canada. So much information and inspiration!
Seed Saver’s Exchange: Global seed-saving group with lots of information and ways to exchange seed with other gardeners around the world.
MASA Seed Foundation: Awesome local seed-saving farm and group founded by the seed guru Rich Pecoraro.
Sweet Pea Facebook Group: Tons of helpful information on growing and saving sweet peas. Lots of exchanges with Roger Parsons, the OG of sweet pea growers.
Please COMMENT below if you have more seed-saving resources, and I’ll add them here!